VR in Unity: How to Create a Continuous Movement System & Track Real Space Movement
I covered teleportation in my last guide and here I’ll dig into the other primary movement system for VR — Continuous Movement.

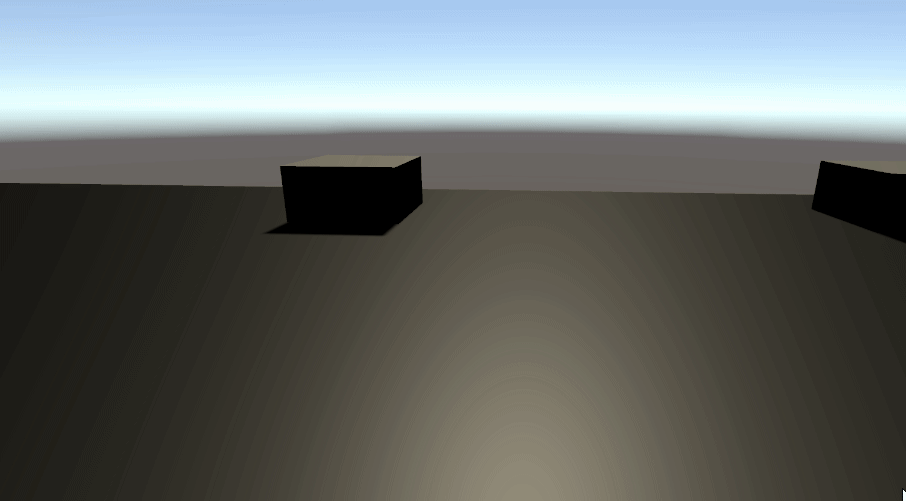
Step 1: Create a navigable plane for testing. I just used a bunch of cube primitives and resized them to create ramps and stairs.
Step 2: Create a new script for your movement behaviors, I will name mine ContinuousMovement, and add it to your VR Rig object. Add the XR and XR Interaction Toolkit Namespaces.

Step 3: Create a public XRNode variable to store our input source and assign it to LeftHand in the inspector. This is another way to get a handle to a controller without using Device Characteristics.


Step 4: In the update method get a handle to our input device’s primary2DAxis and store it as a Vector2 variable inputAxis.


Step 5: Create a character controller variable, assign it in the Start method, and create a Fixed Update method to control movement. Fixed Update is used as the preferred method for physics calculations. We also create a serialized speed variable to modify speed in the inspector.
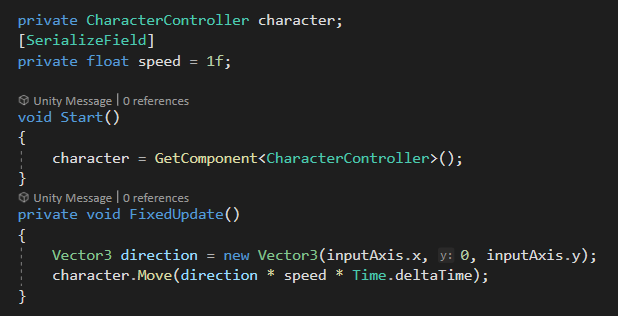
Step 6: Add the Character Controller component to our VR Rig. Set the radius to 0.15 and the Y center to 1 to line the capsule collider up with our Rig. Now we can test and we have basic movement, but the directions are fixed and do not match the direction our headset is facing.

To fix this, we create and assign a private XRRig variable to access our headset camera yaw angles. In FixedUpdate we create a new Quaternion variable to store the headYaw angle and add this data to our direction calculation.


Testing the game now yields the intended movement behavior, however as we have not implemented gravity our character remains in elevated space forever if we climb the stairs.

Step 7: To implement gravity we need two new variables — gravity and falling speed and we need to only calculate gravity acceleration if we are not grounded. This can be done with a SphereCast, which is preferable over a raycast because it has thickness and if we are standing right on an edge the behavior will be more accurate. We also need to create a new layer in our scene to store our “ground” objects so that our SphereCast calculation for whether we are grounded only registers if we are on an appropriate object. Assign the new “Ground” layer to all appropriate objects as well as the the correct field in the Continuous Movement component.


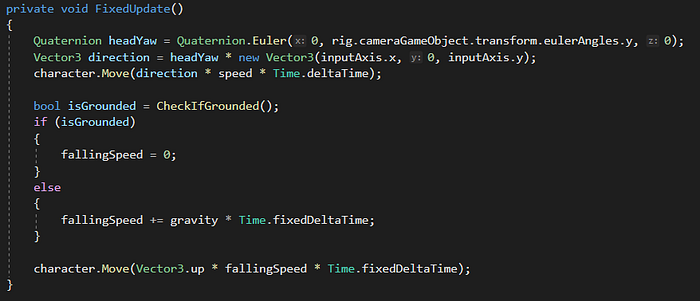
Our character controller now properly accounts for gravity and we have a suitable fall behavior.

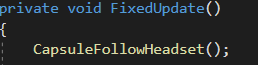
Step 8: Track Real Space Movement. We can add 6 degree of freedom control by tying in our physical space movements to our character movements. To do this we need to instruct our character controller to match and follow our headset positioning. We create a new function “CapsuleFollowHeadset” to tie these together and call it first thing in FixedUpdate(). A heightOffset value is added of 0.2f to account for the space between our eye level and the actual top of our head / character. Without this our total height will be exactly at eye level.


With this addition my movement in real space is translating correctly into our player movement and it feels pretty responsive.
However, it is possible to further refine our movement physics behavior to match the capabilities of our headset, which can reduce the notion of jittery movement. Navigate to Edit -> Project Settings -> Time. The Oculus headset I have has a refresh rate of 90Hz so we can update our Fixed Timestep value to match our refresh rate by setting it to 0.011111111(etc.).
We now have clean movement representation in our headset and three methods for traversing our scene (teleport trigger, real space movement, and thumbpad axis), which can even be used together!
Step 10: Controller Rotation. One final quality of life addition to our scene is to add the capability for a player to rotate their character position without rotating their head in real space. This is useful for seated desk players or for confined spaces, allowing you to fully traverse the scene without moving your body. Fortunately this is a simple implementation — on the VR Rig add the Snap Turn Provider (Device-Based) component. Input Source should be kept as Primary 2D Axis and in the Controllers array add 1 element then click the circle button to search for and select our Right Hand controller.
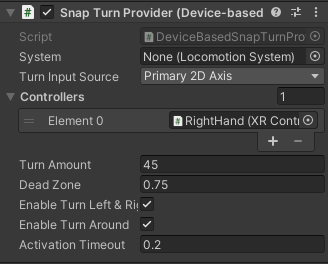
The settings are up to you but keeping 30-45 for the turn amount and updating Activation Timeout from 0.5 to 0.2 feels good for my taste.
That’s all for this guide! In my next guide I’ll cover grab interactions in more detail and how to further interact with a grabbed object. See ya there!